

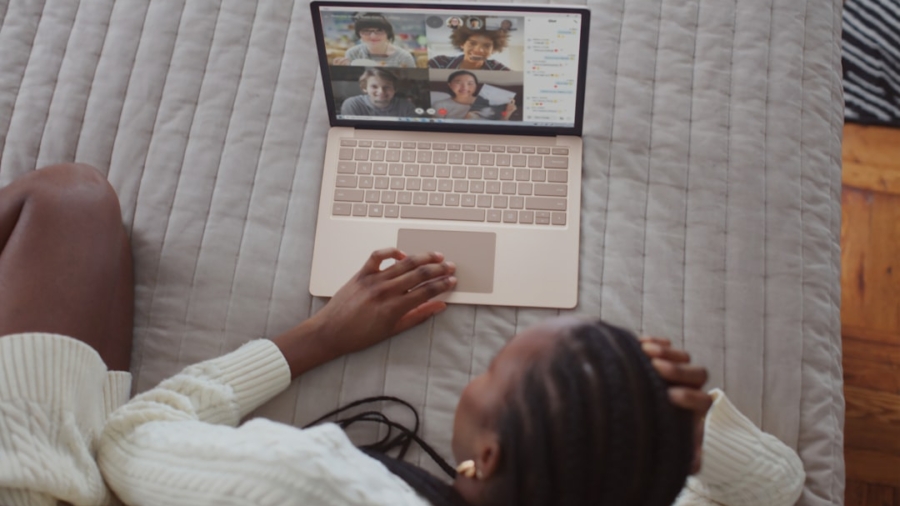
You’re looking to upgrade your video calls and wondering if a fancy webcam and a good lighting setup can really make a difference. The short answer is a resounding yes. Think of it like this: your laptop’s built-in webcam is a bit like a budget point-and-shoot camera from 2005, and your average room lighting is doing it no favors. Investing in a quality external webcam and a thoughtful lighting setup can dramatically improve your video feed, making you look more professional, presentable, and ultimately, more engaged in your virtual interactions. It’s not just about looking good; it’s about clear communication and making a positive impression.
Let’s be honest, most laptop webcams are an afterthought for manufacturers. They prioritize cost and thinness over image quality. This often results in a subpar experience, and understanding why can help you appreciate the benefits of an upgrade.
Poor Resolution and Sensor Size
The biggest culprits are low resolution and tiny image sensors. Most built-in webcams are still 720p or, at best, 1080p, which is fine for basic chatting but doesn’t offer much detail. More importantly, the small sensor struggles to capture enough light, leading to grainy, noisy footage, especially in anything less than perfect lighting conditions. Think of a small sensor trying to see in the dark – it’s going to struggle.
Fixed Focus and Limited Field of View
Another common issue is fixed focus. Your laptop webcam is generally set to focus at an average distance, meaning if you lean in or out, you might appear soft or blurry. They also often have a very wide field of view, capturing a lot of your background (and whatever mess might be there) when you only want to focus on yourself. This can be distracting for your audience.
Lack of Control and Features
Built-in webcams offer almost no control over settings like exposure, white balance, or zoom. You’re stuck with whatever automatic adjustments they make, which are often not ideal. External webcams, on the other hand, usually come with software that allows you to fine-tune these settings, giving you much more power over your image.
To further explore the importance of creating high-quality content for online interactions, you might find it beneficial to read an article on the best niches for affiliate marketing on Facebook. This resource highlights how effective communication tools, such as advanced webcams and proper lighting setups, can enhance your online presence and engagement. You can check it out here: The Best Niches for Affiliate Marketing in Facebook.
Key Takeaways
- Clear communication is essential for effective teamwork
- Active listening is crucial for understanding team members’ perspectives
- Conflict resolution skills are necessary for managing disagreements
- Trust and respect are the foundation of a successful team
- Collaboration and cooperation are key for achieving common goals
Choosing the Right Advanced Webcam
Stepping up from a built-in webcam opens up a world of possibilities. But with so many options, how do you pick the right one? Focus on these key features.
Resolution and Frame Rate
For professional video calls, aim for at least 1080p resolution at 30 frames per second (fps). This provides a crisp, clear image that looks smooth. If your internet connection and computer can handle it, 1080p at 60fps or even 4K at 30fps will offer an even more premium experience, with greater detail and smoother motion. Keep in mind that higher resolutions and frame rates demand more bandwidth and processing power.
Sensor Size and Aperture
This is where the magic happens for low-light performance. A larger sensor (even slightly larger than a tiny built-in one) can gather more light, resulting in less noise and better image quality in dimly lit environments. Look for webcams that specify a larger sensor size or mention good low-light performance. A lower f-stop number (e.g., f/2.0 rather than f/2.8) indicates a wider aperture, meaning the lens lets in more light, which is also beneficial for low-light situations.
Autofocus vs. Fixed Focus
Autofocus is generally preferred as it keeps you sharp even if you move slightly. Some high-end webcams offer advanced facial tracking autofocus, which is particularly useful if you tend to gesture while speaking. Fixed-focus webcams, while often cheaper, require you to stay within a specific distance from the camera to remain clear.
Field of View (FOV)
Think about what you want your webcam to capture. Do you want a tight headshot, or do you need to show more of your surroundings or another person? Look for webcams with adjustable FOV or multiple FOV options. A wider FOV (e.g., 90 degrees) is good for showing more, while a narrower one (e.g., 60-70 degrees) is better for individual close-ups. Some webcams offer software-based cropping to adjust the FOV.
Microphone Quality (Optional but Recommended)
While this article focuses on video, it’s worth noting that a good external webcam often comes with a better built-in microphone than your laptop. However, for truly excellent audio, a dedicated external microphone is always recommended. If you’re not ready for a separate microphone, look for webcams that highlight their dual-stereo microphones or noise-canceling capabilities.
Brand Reputation and Software
Stick with reputable brands like Logitech, Elgato, Razer, or Poly. They generally offer better build quality, reliable drivers, and intuitive software. The software provided by the webcam manufacturer is crucial for unlocking advanced features like digital zoom, pan, tilt, exposure control, and color correction. Ensure the software is compatible with your operating system.
Mastering Your Lighting Setup

Even the best webcam in the world will struggle with bad lighting. Your goal is to illuminate your face evenly and effectively, creating a flattering and professional look.
The Importance of Key Light
Your “key light” is your primary light source, and it should be positioned slightly off-center and above your eye level. This creates natural-looking shadows that give your face dimension and avoid a flat, unflattering look.
A ring light is a popular option because it provides even, soft light and minimizes shadows. If you’re using a strong directional light, consider diffusing it with a softbox or a piece of parchment paper to soften the harshness.
Fill Light for Shadow Control
A key light alone can create harsh shadows on one side of your face. This is where a “fill light” comes in.
Position it on the opposite side of your key light, at a lower intensity. Its purpose is to soften those shadows, not eliminate them entirely. A small LED panel or even a white poster board reflecting your key light can serve as an effective fill light.
Backlight for Separation
While not always necessary, a “backlight” can add a professional polish to your video.
Positioned behind you, aimed at the back of your head and shoulders, it creates a subtle glow that separates you from your background. This adds depth and prevents you from blending into the background, especially if your background is dark. A small LED light or even a carefully positioned desk lamp can work as a backlight.
Avoiding Common Lighting Pitfalls
- Avoid backlighting from windows: Sitting with a bright window directly behind you (without blinds or curtains) will make you appear as a dark silhouette.
Your webcam will try to expose for the bright background, leaving your face in shadow.
- No overhead lighting: Direct overhead lighting creates harsh shadows under your eyes and nose, making you look tired and unflattering. If you can’t avoid it, try to compensate with a strong key light.
- Even light is key: Aim for consistent, even light across your face. Patchy lighting can be distracting.
- Experiment with color temperature: Most modern lights allow you to adjust the color temperature from warm (yellowish) to cool (bluish).
Experiment to see what looks most natural and flattering for your complexion and environment. Generally, a natural daylight temperature (around 5000K-5500K) is a good starting point.
Beyond Webcam and Lighting: Optimizing Your Environment

Even with top-notch gear, a messy or distracting environment can undermine your efforts. A little thought goes a long way.
Your Background Matters
Keep your background clean, uncluttered, and professional. A solid, neutral-colored wall is often the best choice. If you want to add personality, carefully select a few items to display, like a bookcase with neatly arranged books or a plant.
Avoid busy patterns, bright colors that clash, or anything that might be distracting.
Camera Angle and Eye Contact
| Metrics | Before Setup | After Setup |
|---|---|---|
| Video Resolution | 720p | 1080p |
| Frame Rate | 15 fps | 30 fps |
| Low Light Performance | Blurry | Clear |
| Color Accuracy | Poor | Excellent |
| Background Noise | High | Low |
Position your webcam at eye level or slightly above. This prevents the unflattering “up-the-nose” shot and creates a more natural perspective. A small webcam stand or even a stack of books can help achieve the right height. When speaking, try to look directly into the camera lens to simulate eye contact with your audience. It makes a huge difference in how engaged you appear.
Audio is Half the Battle
Seriously, don’t neglect your audio. While this article focuses on video, poor audio can derail a call faster than blurry video. Consider investing in a dedicated USB microphone (like a Blue Yeti or Rode NT-USB Mini) or a good quality headset. Minimizing background noise from fans, air conditioning, or pets is also crucial.
Software Settings and Enhancements
Most video conferencing platforms (Zoom, Microsoft Teams, Google Meet) offer built-in video settings. Take the time to explore them. You can often adjust brightness, contrast, and even apply “touch-up my appearance” filters which, when used subtly, can be beneficial. Ensure your platform is set to use your external webcam and not the built-in one. Also, check which microphone is selected.
Internet Connection Reliability
Even the best hardware can’t overcome a shoddy internet connection. A stable, high-speed connection is paramount for clear video and audio. If possible, use an ethernet cable instead of Wi-Fi, especially for important calls. Close unnecessary applications and tabs that might be consuming bandwidth.
To achieve the best results in enhancing video call quality, it’s essential to consider not only your webcam and lighting setup but also the device you are using. For instance, selecting the right tablet can significantly impact your overall experience during video calls. If you’re curious about which tablet might be the best fit for everyday use, you can explore this insightful article on the best tablets available today. By combining a high-quality webcam, proper lighting, and a reliable tablet, you can ensure that your video calls are clear and professional.
Putting It All Together: A Step-by-Step Approach
Upgrading your video call setup doesn’t have to be overwhelming. Follow these steps for a practical approach.
Step 1: Assess Your Current Setup
Before buying anything, take a critical look at what you have. Do a test call with a friend or record yourself. Pay attention to:
- Video Quality: Is it grainy? Is it well-lit? Are you in focus?
- Audio Quality: Do you sound clear? Is there background noise?
- Background: Is it distracting? Is it professional?
- Camera Angle: Does it look flattering?
This assessment will help you identify your biggest pain points and prioritize your upgrades.
Step 2: Research and Select Your Webcam
Based on your needs and budget (webcams can range from $50 to several hundred dollars), research suitable external webcams. Read reviews, compare specifications, and watch unboxing videos. Consider what features are most important to you (resolution, low-light performance, FOV).
Step 3: Plan Your Lighting
Before buying any lights, think about your space.
- Natural Light: Can you position yourself to take advantage of natural light from a window? If so, great! Use it as your primary key light and supplement as needed.
- Artificial Light Needs: Do you need a dedicated key light, fill light, or backlight?
- Types of Lights: Ring lights, small LED panels, or even diffused desk lamps are common choices.
Step 4: Acquire Your Gear
Purchase your chosen webcam and lighting equipment. Don’t forget accessories like a webcam tripod or stand if needed.
Step 5: Setup and Test
This is where it all comes together.
- Mount your webcam: Place it at eye level.
- Position your key light: Slightly off-center, above eye level.
- Position your fill light: Opposite the key light, lower intensity.
- Position your backlight (optional): Behind you.
- Clean up your background: Clear any clutter.
- Do a test call: Record yourself or hop on a call with a friend. Adjust lighting positions, intensities, and webcam settings until you achieve the desired look.
- Adjust software settings: Fine-tune your webcam’s settings using its dedicated software and/or your video conferencing platform’s settings.
Remember, practice makes perfect.
It might take a few tries to get everything dialed in exactly how you want it.
But the effort will be well worth it when you’re looking sharp and sounding clear on every video call.
FAQs
1. What are the benefits of using an advanced webcam for video calls?
Using an advanced webcam can improve video call quality by providing higher resolution, better low-light performance, and more accurate color reproduction. This can result in clearer and more professional-looking video calls.
2. How does lighting setup affect video call quality?
Proper lighting can greatly enhance video call quality by reducing shadows, improving visibility, and creating a more flattering appearance. A well-planned lighting setup can make a significant difference in the overall look of a video call.
3. What features should I look for in an advanced webcam for video calls?
When choosing an advanced webcam for video calls, look for features such as high resolution (1080p or higher), low-light performance, autofocus, and a wide field of view. These features can contribute to a better video call experience.
4. What are some tips for setting up a professional lighting arrangement for video calls?
To set up a professional lighting arrangement for video calls, consider using soft, diffused lighting sources to minimize harsh shadows. Position the lights to evenly illuminate your face and avoid glare on the webcam. Experiment with different angles and intensities to find the most flattering setup.
5. Are there any additional accessories that can further enhance video call quality?
In addition to an advanced webcam and professional lighting setup, accessories such as a high-quality microphone, a green screen for virtual backgrounds, and a tripod for stable camera positioning can further enhance video call quality. These accessories can contribute to a more professional and polished video call experience.
Enjoying our content? Make us a preferred source on Google:
Add us as a Preferred Source on Google