

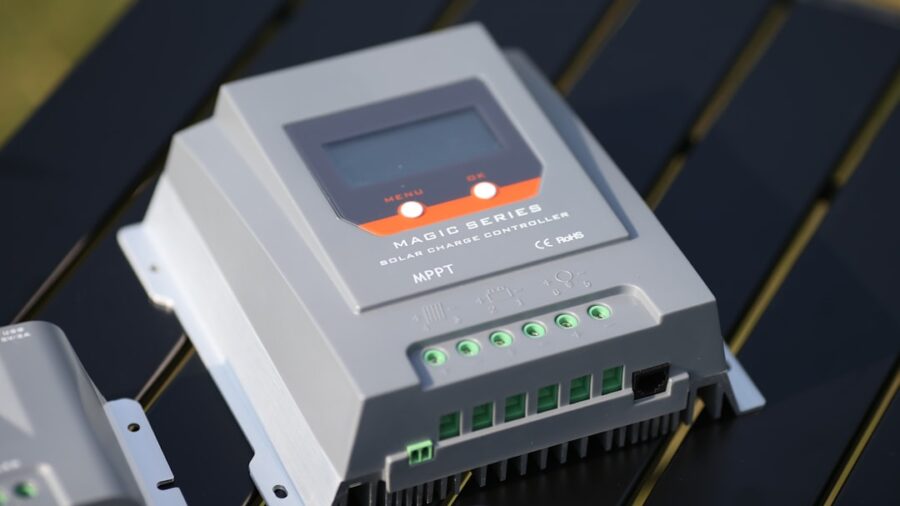
So, you’ve got a smart solar inverter, and you’re dreaming of seeing its data right there in your home automation dashboard, alongside your lights, thermostat, and door sensors. Good news – it’s absolutely doable!
The trick is understanding how your inverter communicates and then bridging that communication to your chosen home automation platform.
There’s no single “magic button” solution, but with a little digging and the right tools, you can pull it off.
Why Integrate Your Solar Inverter?
You might be asking, “Why bother?” Well, imagine this: instead of opening a separate app to check your solar production, it’s just another tile on your main home screen. You can see your energy generation alongside your consumption, making informed decisions about when to run energy-intensive appliances. Want to automatically turn on your EV charger when production is high? Or dim lights when your battery is running low? That’s the power of integration. It’s about centralizing information and enabling smarter, more efficient energy use, moving beyond just raw numbers to actionable insights.
For those looking to enhance their home automation systems, integrating smart solar inverters can be a game changer. A related article that delves into the latest trends in home technology and automation is available at Enicomp’s Technology News and Reviews. This resource provides valuable insights into how various smart devices can work together to create a more efficient and sustainable living environment.
Understanding Your Inverter’s Communication
Before you can integrate anything, you need to know how your solar inverter “talks.” This is the most crucial first step, as it dictates your options.
Common Communication Protocols
Most modern smart inverters use one of a few common methods to communicate data. Knowing yours is half the battle.
- Modbus (TCP/IP or RTU): This is a widely used industrial communication protocol. Many inverters, especially commercial or higher-end residential ones, support Modbus. Modbus TCP/IP uses your local network, while Modbus RTU typically requires a serial connection (like RS485), often with an adapter to USB or Ethernet. If your inverter has an Ethernet port or you’re using a data logger connected via Ethernet, Modbus TCP/IP is a strong possibility.
- API (Application Programming Interface): Many manufacturers offer their own cloud-based APIs. This means your inverter sends data to their online portal, and you can then access that data (with proper authentication) through their API. This is common for brands like Enphase, SolarEdge, Fronius, and others. The upside is usually simpler access; the downside is reliance on the manufacturer’s cloud services.
- Local Web Interface/Scraping: Some inverters have a built-in web server you can access directly from your local network. You can often view real-time data there. While not an official API, it’s sometimes possible to “scrape” this data using specialized tools, though it can be fragile if the inverter’s web interface changes.
- Proprietary Protocols/Data Loggers: Less common now, but some older or niche systems might use proprietary protocols, often requiring a manufacturer-specific data logger or gateway device. These can be trickier to integrate without official support.
How to Find Out Your Inverter’s Protocol
This often requires a bit of detective work.
- Check Your Inverter’s Manual: This is your first stop. Look for sections on “communication,” “data export,” “monitoring,” or “network settings.” It will usually specify supported protocols like Modbus, or mention an API.
- Manufacturer’s Website/Developer Portal: Search your inverter manufacturer’s website. Many have developer sections or documentation for their APIs. Look for terms like “API documentation,” “integration guide,” or “third-party access.”
- Your Installer: Your solar installer might know how your system communicates or how they access its data. They might even have experience with similar integrations.
- Online Forums/Communities: Websites like Home Assistant forums, Reddit’s r/homeautomation, or dedicated solar forums are goldmines. Someone else has likely tried to integrate the same inverter as yours. Search specifically for “[Your Inverter Model] Home Assistant” or “[Your Inverter Model] integration.”
Choosing Your Home Automation Platform
Once you know how your inverter talks, you need a place for it to talk to. This is where your home automation dashboard comes in.
Popular Home Automation Platforms
The choice of platform heavily influences the integration process.
- Home Assistant (HA): This open-source platform is incredibly powerful and flexible. It’s renowned for its extensive integrations (thousands!) and strong community support. If you want deep control and customization, HA is often the best bet, though it has a steeper learning curve than some others. It runs on a Raspberry Pi, mini PC, or even a virtual machine.
- OpenHAB: Another open-source, Java-based home automation platform with a large community and wide device support. Similar to Home Assistant in flexibility, often a matter of personal preference which one you find easier to work with.
- Hubitat Elevation: A local-first smart home hub that emphasizes privacy and offline operation. It has a good developer community for custom drivers and apps, but might not have as many direct solar inverter integrations as HA out-of-the-box.
- SmartThings/Aeotec Hub: A popular consumer-friendly platform, now owned by Aeotec. While it supports many smart devices, direct solar inverter integration is less common unless the manufacturer provides a specific SmartThings integration. It’s more cloud-dependent.
- Control4/Crestron: These are high-end, professionally installed systems. Integration here typically involves working with your installer or a certified programmer, as they use proprietary development environments.
- Node-RED: While not a full home automation platform itself, Node-RED is an excellent flow-based programming tool that can act as a bridge or a central logic engine for various platforms. It’s very good at handling data flows and can be used to pull data from inverters and push it to other systems.
Considerations When Choosing
- Technical Skill Level: Home Assistant and OpenHAB offer the most flexibility but require more technical comfort. Consumer hubs are easier but more limited.
- Local vs. Cloud: Do you want your data to stay on your local network (more private, less reliant on internet) or are you okay with cloud-based solutions?
- Existing Ecosystem: If you already use one of these platforms for other devices, sticking with it makes sense.
- Community Support: A strong community means more resources and help if you get stuck.
Integrating via Modbus
If your inverter supports Modbus, this is often the most reliable and local integration method.
Modbus TCP/IP
This is generally the easiest Modbus integration.
- Identify Modbus Registers: The absolute first step is to find your inverter’s Modbus register map. This is a document (often a PDF) from the manufacturer that lists specific memory addresses (registers) where different data points (voltage, current, power, energy, etc.) are stored. This is crucial; without it, you’re guessing. Search for “[Your Inverter Model] Modbus register map” or “Modbus communication guide.”
- Enable Modbus: Some inverters require you to enable Modbus communication in their settings, usually via the inverter’s LCD screen or its local web interface.
- Network Connection: Ensure your inverter (or its data logger) is connected to your local network via an Ethernet cable.
- Home Assistant Configuration (Example):
- Install the Modbus integration.
- Add a
modbusentry to yourconfiguration.yamlfile (or use the UI integration if available):
“`yaml
modbus:
- name: solar_inverter
type: tcp
host: 192.168.
1.
100 # Replace with your inverter’s IP address
port: 502 # Common Modbus TCP port
sensors:
- name: Inverter AC Power
slave: 1 # Often 1, but check your manual
address: 40062 # Example register for AC power, CHECK YOUR MANUAL
input_type: holding # Or ‘input’, check your manual
data_type: int16 # Or ‘uint16’, ‘float’, etc. CHECK YOUR MANUAL
unit_of_measurement: W
scale: 1 # Or 0.1, 0.01, etc. for scaling, CHECK YOUR MANUAL
offset: 0
count: 1
precision: 0
- name: Inverter Daily Energy
slave: 1
address: 40070 # Another example, CHECK YOUR MANUAL
input_type: holding
data_type: float # Often energy values are float
unit_of_measurement: kWh
scale: 0.001 # If the inverter reports Wh, convert to kWh
offset: 0
count: 2 # Floats often take 2 registers
precision: 2
“`
- Crucial Reminder: The
address,input_type,data_type,scale, andcountparameters must match your inverter’s Modbus register map exactly. This is where most people get stuck. If the data looks wrong, double-check these values.
- Test and Refine: Restart Home Assistant, check the logs for errors, and verify the sensor values. You’ll likely need to tweak the configuration.
Modbus RTU (via RS485)
This is a bit more involved as it requires additional hardware.
- Hardware: You’ll need an RS485 to USB adapter (for a Raspberry Pi or computer) or an RS485 to Ethernet converter.
- Wiring: Connect the RS485 A/B wires from your inverter to the corresponding A/B terminals on your adapter. Ensure correct polarity.
- Identify Modbus Registers: Same as Modbus TCP/IP, you need your inverter’s register map.
- Home Assistant Configuration (Example with USB adapter):
“`yaml
modbus:
- name: solar_inverter_rtu
type: serial
method: rtu
port: /dev/ttyUSB0 # Or wherever your USB adapter is mounted
baudrate: 9600 # Common, but check your inverter manual
stopbits: 1
bytesize: 8
parity: N
sensors:
- name: Inverter AC Power RTU
slave: 1
address: 40062
input_type: holding
data_type: int16
unit_of_measurement: W
scale: 1
offset: 0
count: 1
precision: 0
“`
- Again, carefully match all parameters, especially
baudrate,stopbits,bytesize, andparityfrom your inverter’s manual.
- Permissions: You might need to give your Home Assistant user (e.g.,
homeassistant) access to the serial port (/dev/ttyUSB0) if running on Linux.
Integrating smart solar inverters into your home automation dashboard can significantly enhance energy management and efficiency. For those looking to optimize their home technology, exploring related topics can provide valuable insights. For instance, a recent article discusses the best software for video editing in 2023, which highlights the importance of selecting the right tools for your digital projects. You can read more about it here. By understanding how various technologies can work together, homeowners can create a more cohesive and efficient living environment.
Integrating via Manufacturer API
This method relies on your inverter manufacturer providing an API and often an existing integration within your chosen home automation platform.
Checking for Existing Integrations
- Home Assistant Integrations Page: Go to the Home Assistant integrations page (search “Home Assistant integrations”) and search for your inverter brand (e.g., “Fronius,” “SolarEdge,” “Enphase”). Many popular brands have official or community-developed integrations.
- OpenHAB Bindings: Similar to Home Assistant, search the OpenHAB bindings directory for your inverter.
- Community Forums: If there’s no official integration, sometimes community members have built custom components or drivers.
Steps for API-based Integration (General)
- Create Developer Account/Get API Key: Many manufacturers require you to sign up for a developer account on their portal and generate an API key or access token. This authenticates your requests to their data.
- Enable Data Export: Ensure data export or API access is enabled in your inverter’s online portal settings.
- Install Integration/Binding:
- Home Assistant: If an integration exists, you’ll usually add it via the “Configuration -> Devices & Services -> Add Integration” menu. You’ll then input your API key, site ID, or other credentials.
- OpenHAB: Install the relevant binding through the UI or
addons.cfg.
- Configuration: Follow the specific instructions for that integration. This usually involves providing your inverter’s serial number, site ID, API key, and sometimes a specific URL.
- Sensors Created: The integration will typically create various sensors (current power, daily energy, lifetime energy, battery status if applicable) automatically.
- Limitations: Remember that API integrations rely on the manufacturer’s cloud. If their servers are down, your data won’t update. There might also be rate limits on how often you can pull data.
Integrating via Node-RED (and MQTT)
Node-RED is a fantastic intermediary, especially if direct integration is tricky or if you want to perform complex logic on your solar data before sending it to your dashboard. It pairs very well with MQTT (Message Queuing Telemetry Transport), a lightweight messaging protocol.
Why Node-RED + MQTT?
- Flexibility: Node-RED can talk to almost anything – Modbus, HTTP APIs, local files, shell commands.
- Data Transformation: You can clean, scale, combine, or perform calculations on your solar data before sending it.
- Decoupling: Node-RED acts as a bridge, isolating your home automation platform from the direct inverter communication. If the inverter integration breaks, Node-RED can still try to fetch data without crashing your HA.
- Lightweight Messaging: MQTT is efficient and great for pushing data to multiple subscribers (like Home Assistant) simultaneously.
Steps for Node-RED + MQTT Integration
- Install Node-RED: Often run on the same device as Home Assistant (e.g., Raspberry Pi) or a dedicated machine.
- Install MQTT Broker: Home Assistant can run an MQTT broker Add-on (Mosquitto is common), or you can use a separate MQTT server.
- Install Node-RED Palettes: You’ll likely need to install specific Node-RED palettes (via the “Manage Palette” menu) depending on your inverter’s communication method:
node-red-contrib-modbus: For Modbus communication.node-red-node-http-request: For making HTTP requests to APIs or local web interfaces.node-red-contrib-json: For parsing JSON responses from APIs.node-red-contrib-mqtt-broker: For sending data to an MQTT broker.
- Create a Flow in Node-RED:
- Input Node:
- Modbus: Use a Modbus Read node. Configure it with your inverter’s IP/port (for TCP) or serial port (for RTU), slave ID, and the Modbus registers you want to read. You’ll specify the
function code(e.g.,read holding registers) and theaddress. - API: Use an HTTP Request node. Configure it to make a GET request to your inverter’s API endpoint (e.g.,
http://your-inverter-ip/solar_api/v1/GetRealtimeData.cgi). Add any necessary headers for API keys or authentication. - Scraping: Use an HTTP Request node to get the page, then potentially a
cheerioorJSOUPnode (if available) to parse the HTML. This is generally less reliable. - Function Node (Data Processing): This is where you transform the raw data.
- If Modbus, you’ll need to interpret the byte arrays into usable numbers (e.g., combining two 16-bit registers into a 32-bit float, applying scaling factors).
- If API, you’ll parse the JSON response (
JSONnode) and then use aFunctionnode to extract the specific values you need and give them meaningful names. - Example (Modbus raw to Watts):
“`javascript
// Assuming msg.payload is an array of raw Modbus register values
// and you need to combine two 16-bit registers (e.g., register 40062 and 40063)
// to form a 32-bit value for instantaneous power.
// Check your inverter’s Modbus map carefully for data types and order.
// Example: If 40062 is low word and 40063 is high word
let lowWord = msg.payload[0]; // Value from 40062
let highWord = msg.payload[1]; // Value from 40063
let instantaneousPower = (highWord << 16) | lowWord;
// Apply any scaling factor if needed (e.g., if data is in 0.1W units)
let scaledPower = instantaneousPower * 0.1;
msg.payload = scaledPower; // Or wrap in an object for multiple values
return msg;
“`
- Example (API JSON parsing):
“`javascript
// Assuming msg.payload is a JSON string from an API response
let data = JSON.parse(msg.payload);
let currentPower = data.Body.Data.PAC.Value;
let dailyEnergy = data.Body.Data.DAY_ENERGY.Value / 1000; // Convert Wh to kWh
msg.payload = {
power_watts: currentPower,
daily_energy_kwh: dailyEnergy
};
return msg;
“`
- MQTT Out Node: Configure this node to publish your processed data to your MQTT broker.
- Set the
topic(e.g.,home/solar/inverter/power_watts). - Set the
QoS(Quality of Service) to 0 or 1. - Ensure “Retain” is checked if you want the MQTT broker to keep the last value, so Home Assistant can pick it up immediately on restart.
- Home Assistant MQTT Sensor Configuration: In Home Assistant, you’ll create MQTT sensors that subscribe to these topics.
“`yaml
sensor:
- platform: mqtt
name: “Solar Inverter Current Power”
state_topic: “home/solar/inverter/power_watts”
unit_of_measurement: “W”
device_class: “power”
state_class: “measurement”
- platform: mqtt
name: “Solar Inverter Daily Energy”
state_topic: “home/solar/inverter/daily_energy_kwh”
unit_of_measurement: “kWh”
device_class: “energy”
state_class: “total_increasing” # Important for energy dashboards
“`
- For the
state_classattribute,total_increasingis critical for Home Assistant’s Energy Dashboard to correctly track cumulative energy.
Displaying Data in Your Dashboard
Once the data is flowing into your home automation platform, it’s time to make it visible and useful.
Creating Sensors and Entities
As shown in the previous examples, your integration method will create “entities” or “items” within your platform. These are the specific data points like sensor.solar_inverter_ac_power or item.solar_daily_energy.
Home Assistant Energy Dashboard
This is arguably one of the most compelling reasons to integrate your solar inverter into Home Assistant.
- Configure Energy Dashboard: Go to “Configuration -> Energy.”
- Add Solar Production: Select your solar production sensor (e.g.,
sensor.solar_inverter_daily_energy) under “Solar production.” Ensure this sensor hasunit_of_measurement: kWhandstate_class: total_increasing. - Add Grid Consumption (Optional): If you also monitor your grid consumption, add that sensor here.
- Add Battery Storage (Optional): If you have a battery, add its charge/discharge sensors.
The Energy Dashboard will then provide beautiful graphs and statistics on your energy flow, self-sufficiency, and more.
Custom Dashboards (Lovelace, sitemaps)
Beyond the dedicated Energy Dashboard, you’ll want to display real-time data on your main dashboards.
- Home Assistant (Lovelace UI):
- Use cards like “Entities Card,” “Sensor Card,” “Gauge Card,” “History Graph Card,” or “ApexCharts Card” (a custom integration for more advanced graphs).
- You can group related solar entities into a single card or even create a dedicated “Solar” view on your dashboard.
- OpenHAB (sitemaps, Main UI): Use sitemaps for simpler dashboards or the flexible Main UI for more modern, customizable layouts.
- Hubitat: Use the built-in Dashboard feature to add tiles for your solar data.
Automation Examples
With your solar data in your dashboard, you can now create powerful automations.
- EV Charging: Automatically start charging your electric vehicle when solar production exceeds a certain threshold (e.g., 5kW) or when your battery is full.
- Appliance Scheduling: Turn on your dishwasher, washing machine, or water heater when solar production is high to maximize self-consumption.
- Battery Management: Get notifications if your battery is discharging unexpectedly or if it’s not charging as expected.
- Notifications: Send a notification to your phone when your daily solar production hits a new record or if there’s a fault reported by the inverter.
- Load Shedding: If your battery is low and grid power is expensive, automatically switch off non-essential loads.
- Dynamic Lighting: Based on current solar output, adjust ambient lighting to optimize energy use or simply reflect the “energy mood” of your home.
Troubleshooting Common Issues
Integrating solar inverters can be fiddly. Here are some common problems and how to approach them.
- No Data/Sensors Unavailable:
- Check Network: Is your inverter (or data logger) connected to your network? Can you ping its IP address?
- Modbus IP/Port: Double-check the IP address and port (usually 502) in your configuration.
- Modbus Slave ID: Many Modbus devices use a slave ID, often 1. Check your manual.
- Modbus Register Map: This is critical. Are the addresses, data types, and input/holding registers exactly as specified in the manual? Even a small mismatch will result in incorrect or no data.
- API Key/Credentials: Are your API key, site ID, username, and password correct for cloud integrations?
- Inverter Settings: Is Modbus or API access enabled on the inverter itself or in its online portal?
- Firewall: Is a firewall on your home automation device or router blocking the connection to the inverter?
- Home Assistant Logs: Always check your Home Assistant logs (
Settings -> System -> Logs) for error messages. They are often very telling. - Incorrect Data Values:
- Scaling: Most common issue. If your inverter reports watts in 0.1W units, and you’re expecting full watts, you need a
scale: 0.1orscale: 0.01(or similar) in your Modbus or Node-RED configuration. - Data Type: Is the
data_type(e.g.,int16,uint16,float,int32) correct according to the Modbus map? Floats often require reading two 16-bit registers. - Byte Order: Less common now, but some Modbus devices use a different byte order (endianness) for multi-byte values. Your Modbus client might have options for this (e.g.,
byte_order: big_endianorlittle_endian). - Unit Conversion: If the API or Modbus reports Wh, and you want kWh, you’ll need to divide by 1000.
- Intermittent Data:
- Network Stability: Is your Wi-Fi or Ethernet connection stable?
- Rate Limits: If using an API, are you hitting manufacturer rate limits on how often you can query data? Adjust your polling interval.
- Modbus Timeout/Retries: In Modbus configurations, you might be able to adjust timeout and retry settings.
- Inverter Web Interface Slows Down: Sometimes aggressive polling of a local web interface or Modbus can impact the inverter’s own performance. Increase your polling interval if this happens.
Integrating your smart solar inverter into your home automation dashboard is a rewarding project that offers greater insight and control over your home’s energy use. It takes a bit of technical legwork, but the benefits of a truly smart, energy-aware home are well worth the effort. Start by understanding your inverter, choose your platform, and don’t be afraid to dig into the manuals and community forums for specific help. Happy automating!
FAQs
What is a smart solar inverter?
A smart solar inverter is a device that converts the direct current (DC) electricity generated by solar panels into alternating current (AC) electricity that can be used to power home appliances. Smart solar inverters are equipped with advanced monitoring and communication capabilities, allowing for remote monitoring and control of the solar power system.
How can smart solar inverters be integrated into a home automation dashboard?
Smart solar inverters can be integrated into a home automation dashboard using compatible communication protocols such as Wi-Fi, Zigbee, or Modbus. This integration allows homeowners to monitor the performance of their solar power system, track energy production, and optimize energy usage through the home automation dashboard.
What are the benefits of integrating smart solar inverters into a home automation dashboard?
Integrating smart solar inverters into a home automation dashboard provides homeowners with real-time visibility into their solar power system’s performance, enabling them to make informed decisions about energy usage and optimize energy consumption. This integration also allows for seamless control and automation of energy management within the home.
What are some popular home automation dashboards that support smart solar inverter integration?
Popular home automation dashboards that support smart solar inverter integration include platforms such as Home Assistant, OpenHAB, and SmartThings. These platforms offer compatibility with a wide range of smart solar inverters and provide customizable interfaces for monitoring and controlling solar power systems.
Are there any considerations to keep in mind when integrating smart solar inverters into a home automation dashboard?
When integrating smart solar inverters into a home automation dashboard, it is important to ensure compatibility between the inverter and the chosen home automation platform. Additionally, homeowners should consider the security and privacy implications of connecting their solar power system to a home automation dashboard and take appropriate measures to safeguard their data and system integrity.
Enjoying our content? Make us a preferred source on Google:
Add us as a Preferred Source on Google