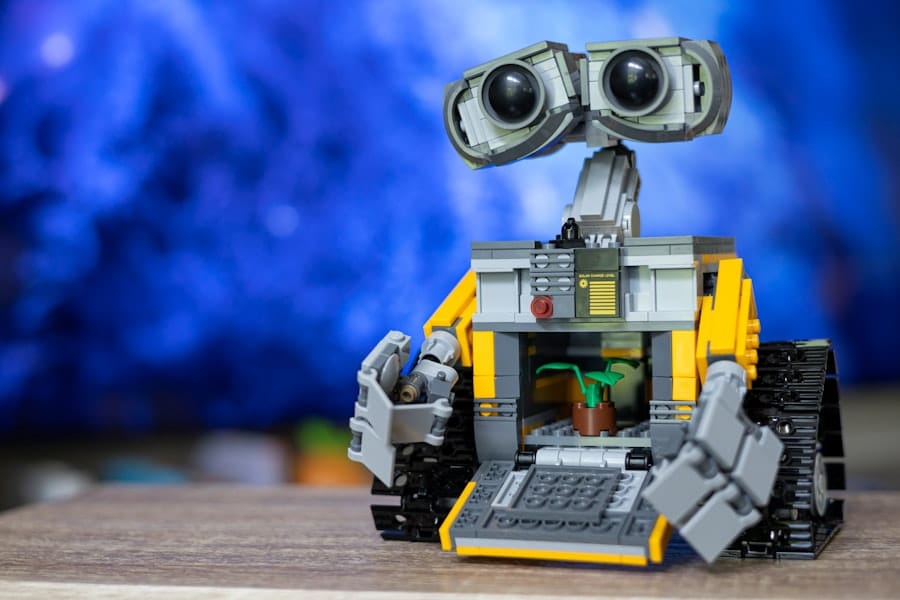
The intersection of LEGO and Raspberry Pi has opened up a world of possibilities for DIY robotics enthusiasts. LEGO, with its modular design and ease of assembly, provides an intuitive platform for building physical structures, while Raspberry Pi serves as a powerful computing unit that can bring those structures to life. This combination allows hobbyists, educators, and students to explore the fundamentals of robotics, programming, and engineering in a hands-on manner.
The appeal of this duo lies not only in their accessibility but also in the vast potential for creativity and innovation they offer. As technology continues to evolve, the demand for skills in robotics and programming has surged. Engaging with DIY robotics projects using LEGO and Raspberry Pi can serve as an excellent introduction to these fields.
It fosters critical thinking, problem-solving, and technical skills that are increasingly valuable in today’s job market. Moreover, the community surrounding these tools is vibrant and supportive, with countless resources available online, including tutorials, forums, and project ideas. This article will guide you through the process of creating your own robot using LEGO and Raspberry Pi, from gathering materials to customizing your creation.
Key Takeaways
- DIY robotics with LEGO and Raspberry Pi is a fun and educational way to learn about robotics and programming.
- Gathering the necessary materials and tools is essential for a successful DIY robotics project.
- Building the robot’s structure with LEGO provides a customizable and versatile foundation for the robot.
- Setting up the Raspberry Pi and programming the robot allows for endless possibilities and functionalities.
- Adding sensors and motors to the robot enhances its capabilities and functionality.
Gathering the Necessary Materials and Tools
Before embarking on your DIY robotics journey, it is essential to gather all necessary materials and tools. The primary components include a Raspberry Pi board—preferably a Raspberry Pi 4 for its enhanced processing power—along with a microSD card for storage, a power supply, and a case for protection. Additionally, you will need a computer to program the Raspberry Pi and access online resources.
A monitor, keyboard, and mouse are also helpful for initial setup. In terms of LEGO components, a standard LEGO Mindstorms kit can provide a solid foundation for your robot’s structure. However, you can also use any LEGO bricks you have on hand to create a custom design.
Motors are crucial for movement; consider using LEGO motors or compatible servo motors that can be controlled via the Raspberry Pi. Lastly, having basic tools like a screwdriver and pliers will facilitate assembly and modifications.
Building the Robot’s Structure with LEGO

Once you have gathered your materials, the next step is to construct the robot’s physical structure using LEGO bricks. The design can vary widely depending on the intended functionality of the robot. For instance, if you aim to create a simple wheeled robot, you might start with a rectangular base made from flat LEGO plates.
Attach wheels to the base using LEGO axles and ensure they are securely fastened to allow smooth movement. Incorporating creativity into your design is key; consider adding features such as a raised platform for the Raspberry Pi or compartments for additional sensors. The modular nature of LEGO allows for easy adjustments—if you find that your initial design is not stable or functional, you can quickly modify it without needing specialized tools.
As you build, think about how the structure will accommodate the components you plan to add later, such as motors and sensors. A well-thought-out design will not only enhance performance but also make troubleshooting easier down the line.
Setting up the Raspberry Pi and Programming the Robot
With the physical structure in place, it’s time to set up the Raspberry Pi. Begin by installing an operating system on your microSD card; Raspbian is a popular choice due to its user-friendly interface and extensive support community. Once the operating system is installed, insert the microSD card into the Raspberry Pi and connect it to your monitor, keyboard, and mouse.
Power up the device and complete the initial setup process. Programming your robot involves writing code that will control its movements and respond to sensor inputs. Python is an excellent programming language for this purpose due to its simplicity and versatility.
You can start by writing basic scripts that control motor functions—such as moving forward, backward, or turning—and gradually incorporate more complex behaviors as you add sensors. Libraries like RPi.GPIO or gpiozero can simplify interactions with GPIO pins on the Raspberry Pi, allowing you to easily control motors and read sensor data. Online resources such as GitHub repositories or forums can provide sample code snippets that can be adapted to your project.
Adding Sensors and Motors to the Robot
Once you have established basic movement capabilities through programming, it’s time to enhance your robot by adding sensors and motors. Sensors are crucial for enabling your robot to interact with its environment; they provide data that can be used to make decisions in real-time. For example, an ultrasonic distance sensor can help your robot avoid obstacles by measuring distances in front of it.
To integrate this sensor, connect it to the GPIO pins on the Raspberry Pi and write code that reads distance data to inform movement decisions. Motors play a vital role in enabling movement beyond simple forward or backward motions. By incorporating servo motors or stepper motors, you can achieve more precise control over your robot’s movements.
For instance, if you want your robot to pick up objects or manipulate its environment, adding a robotic arm powered by servo motors can significantly expand its capabilities. Ensure that your code accounts for these additional components; you may need to implement more complex algorithms that allow for coordinated movements between multiple motors.
Testing and Troubleshooting the Robot

After assembling your robot and integrating sensors and motors, thorough testing is essential to ensure everything functions as intended. Start by running simple tests on individual components—check if each motor responds correctly when commanded and if sensors provide accurate readings. This step-by-step approach helps isolate any issues that may arise during testing.
Troubleshooting is an inevitable part of the DIY robotics process.
If a motor fails to operate as expected, check connections between the motor and the Raspberry Pi; loose wires or incorrect pin assignments can often be culprits.
For sensor issues, verify that they are correctly wired and that your code accurately reflects their specifications. Utilizing print statements in your code can help debug by providing real-time feedback on sensor values or motor states during operation.
Customizing and Expanding the Robot’s Capabilities
Once your robot is operational, consider ways to customize and expand its capabilities further. Customization can range from aesthetic modifications—such as painting or adding decorative elements—to functional enhancements like integrating additional sensors or modules. For example, adding a camera module can enable your robot to perform visual recognition tasks or navigate autonomously using computer vision techniques.
Expanding capabilities might involve incorporating more advanced programming techniques or utilizing machine learning algorithms for decision-making processes. For instance, you could implement line-following behavior using infrared sensors or develop obstacle avoidance algorithms based on sensor data inputs. Engaging with online communities can provide inspiration for new features or challenges that push your robot’s capabilities further.
Conclusion and Next Steps in DIY Robotics
As you conclude your initial DIY robotics project with LEGO and Raspberry Pi, reflect on what you have learned throughout the process. The skills acquired during this journey—ranging from programming fundamentals to hands-on engineering—are invaluable stepping stones toward more complex projects in robotics and technology fields. The experience gained from building a robot not only enhances technical knowledge but also fosters creativity and innovation.
Looking ahead, consider exploring more advanced robotics concepts such as artificial intelligence integration or collaborative robotics projects where multiple robots work together towards a common goal. Engaging with local maker spaces or robotics clubs can provide opportunities for collaboration and learning from others who share similar interests. The world of DIY robotics is vast and continually evolving; each project presents new challenges and opportunities for growth in this exciting field.
If you’re interested in building your own DIY robot using LEGO and Raspberry Pi, you may also want to check out this article on the best software for manga creation here. It provides valuable information on the tools and programs that can help you bring your manga ideas to life.
FAQs
What is a DIY robot?
A DIY robot is a robot that is built by an individual or a group of individuals using do-it-yourself methods and materials, rather than purchasing a pre-built robot.
What is LEGO Mindstorms?
LEGO Mindstorms is a line of kits that contain software and hardware to create customizable, programmable robots using LEGO building blocks.
What is Raspberry Pi?
Raspberry Pi is a small, affordable computer that can be used for a variety of projects, including building robots. It is popular for its versatility and ease of use.
What are the benefits of building a DIY robot using LEGO and Raspberry Pi?
Building a DIY robot using LEGO and Raspberry Pi allows for customization, creativity, and learning about robotics, programming, and electronics. It also provides a cost-effective way to build a robot.
What are the basic steps to build a DIY robot using LEGO and Raspberry Pi?
The basic steps include gathering the necessary materials, building the robot using LEGO Mindstorms, connecting and programming the Raspberry Pi, and testing and refining the robot’s functionality.
What are some examples of DIY robots that can be built using LEGO and Raspberry Pi?
Examples include a line-following robot, a remote-controlled robot, a robot arm, and a robot that can navigate a maze. The possibilities are endless and depend on the builder’s creativity and goals.

