The Raspberry Pi is a small, affordable computer that has revolutionized the way enthusiasts, educators, and professionals approach computing and electronics. Originally developed in the UK by the Raspberry Pi Foundation, this credit card-sized device was designed to promote the teaching of basic computer science in schools and developing countries. Since its inception in 2012, the Raspberry Pi has evolved through several iterations, each offering enhanced capabilities and performance.
Its versatility allows it to be used in a myriad of applications, from simple educational projects to complex industrial automation systems. What sets the Raspberry Pi apart from traditional computers is its accessibility and adaptability. With a price point that often hovers around $35, it provides an entry point for individuals who may not have the resources to invest in more expensive hardware.
The Raspberry Pi supports various programming languages and operating systems, making it an ideal platform for learning and experimentation. Its GPIO (General Purpose Input/Output) pins enable users to connect sensors, motors, and other electronic components, fostering a hands-on approach to learning about computing and electronics.
Key Takeaways
- Raspberry Pi is a small, affordable computer that can be used for a variety of projects and learning opportunities.
- When choosing a Raspberry Pi model, consider the project requirements, such as processing power, connectivity, and form factor.
- Setting up the Raspberry Pi hardware involves connecting peripherals like a keyboard, mouse, and monitor, as well as power supply and storage.
- Installing the operating system on the Raspberry Pi can be done using NOOBS or flashing an SD card with the desired OS image.
- Getting started with programming on the Raspberry Pi can be done using languages like Python and Scratch, and there are many resources available for beginners.
- Connecting peripherals and accessories to the Raspberry Pi, such as cameras, sensors, and displays, can expand its capabilities for various projects.
- Troubleshooting common issues with Raspberry Pi projects may involve checking connections, power supply, and troubleshooting software errors.
- Next steps and advanced projects for Raspberry Pi enthusiasts can include building robots, home automation systems, and media centers, as well as exploring IoT and AI applications.
Choosing the right Raspberry Pi model for your project
Powerful Options for Demanding Projects
The Raspberry Pi 4 Model B, for instance, is one of the most powerful options available, featuring up to 8GB of RAM and support for dual 4K displays. This model is particularly well-suited for projects that require significant processing power, such as media centers or web servers.
Cost-Effective Options for IoT Applications
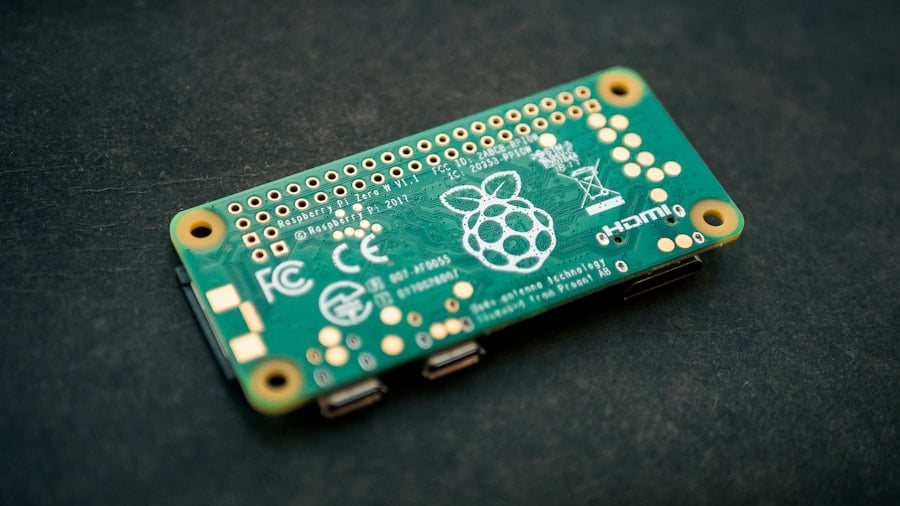
In contrast, the Raspberry Pi Zero W is a smaller, more cost-effective option that includes built-in Wi-Fi and Bluetooth capabilities, making it ideal for IoT (Internet of Things) applications where space and power consumption are critical factors.
Considerations for Choosing the Right Model
When choosing a model, consider the specific requirements of your project. For example, if you are building a retro gaming console, you might prioritize models with higher RAM and processing capabilities to ensure smooth gameplay. Conversely, if your project involves simple sensor data collection or basic automation tasks, a Raspberry Pi Zero W could suffice. Additionally, it’s essential to factor in the availability of accessories and community support for each model, as these can significantly impact your project’s development and troubleshooting processes.
Setting up the Raspberry Pi hardware

Once you have selected the appropriate Raspberry Pi model for your project, the next step is to set up the hardware. The basic components required include the Raspberry Pi board itself, a power supply, a microSD card for storage, and a display output method such as HDMI or composite video. Depending on your project’s needs, you may also want to include additional peripherals like a keyboard, mouse, or camera module.
To begin assembling your Raspberry Pi setup, start by inserting the microSD card into the designated slot on the board. This card will serve as the primary storage device for your operating system and files. Next, connect your display using an HDMI cable or other compatible connectors.
If you plan to use a keyboard and mouse for input, plug them into the USB ports on the Raspberry Pi. Finally, connect the power supply to boot up the device. It’s important to use a power supply that meets the specifications required by your chosen model to avoid performance issues or damage.
Installing the operating system on the Raspberry Pi
The operating system (OS) is a critical component of any computing device, and the Raspberry Pi is no exception. The most popular OS for Raspberry Pi is Raspberry Pi OS (formerly known as Raspbian), which is based on Debian Linux and optimized for performance on ARM architecture. Installing an operating system on your Raspberry Pi can be accomplished using several methods, but one of the most straightforward approaches is to use the Raspberry Pi Imager tool.
To install Raspberry Pi OS using the Imager tool, first download and install it on your computer. Once installed, launch the application and select the OS you wish to install from a list of available options. You can choose from various versions of Raspberry Pi OS or even other operating systems like Ubuntu or LibreELEC for specific use cases.
After selecting your desired OS, choose your microSD card as the target storage device and click “Write.” This process will format the card and install the OS onto it. Once completed, safely eject the microSD card from your computer and insert it into your Raspberry Pi before powering it on.
Getting started with programming on the Raspberry Pi
Programming on the Raspberry Pi opens up a world of possibilities for both beginners and experienced developers alike. The device supports multiple programming languages such as Python, JavaScript, C++, and Scratch, making it an excellent platform for learning coding fundamentals or developing complex applications. Python is particularly favored due to its simplicity and readability, making it an ideal choice for newcomers to programming.
To get started with programming on your Raspberry Pi, you can access various integrated development environments (IDEs) that come pre-installed with Raspberry Pi OS. Thonny is a beginner-friendly Python IDE that provides an intuitive interface for writing and testing code. Users can create simple scripts to control GPIO pins or interact with connected sensors and devices.
For example, a simple Python script can be written to blink an LED connected to one of the GPIO pins, providing immediate feedback on how code translates into physical actions.
Connecting peripherals and accessories to the Raspberry Pi

Input Devices and Sensors
These can range from simple input devices like keyboards and mice to more complex components such as cameras, sensors, and displays. The GPIO pins on the Raspberry Pi allow users to interface with external hardware easily.
Project Examples
For instance, if you are interested in building a weather station project, you can connect temperature and humidity sensors to the GPIO pins. By writing a Python script that reads data from these sensors at regular intervals, you can log environmental data or even display it on an LCD screen connected to your Raspberry Pi. Additionally, camera modules can be attached to capture images or video streams for projects involving surveillance or image processing applications.
Ideal for Prototyping
The flexibility in connecting peripherals makes the Raspberry Pi an ideal platform for prototyping and experimentation.
Troubleshooting common issues with Raspberry Pi projects
As with any technology project, users may encounter challenges while working with their Raspberry Pi setups. Common issues include problems with booting up, connectivity issues with peripherals, or software-related errors during programming. Understanding how to troubleshoot these problems effectively can save time and frustration.
One frequent issue is failure to boot properly after powering on the device. This could be due to an improperly formatted microSD card or an incompatible power supply. To resolve this issue, ensure that you have used the official Raspberry Pi Imager tool to format your microSD card correctly before installing the operating system.
Additionally, verify that you are using a power supply that meets the voltage and current requirements specified for your model. If peripherals are not recognized by the system, check connections and ensure that they are compatible with your version of Raspberry Pi.
Next steps and advanced projects for Raspberry Pi enthusiasts
Once you have gained confidence in using your Raspberry Pi through basic projects and troubleshooting techniques, you may want to explore more advanced applications that leverage its full potential.
Advanced projects could include creating a home automation system using MQTT protocols to control smart devices remotely or setting up a personal cloud server using Nextcloud for file storage and sharing capabilities.
The possibilities are virtually limitless; as you continue experimenting with different projects, you will not only enhance your technical skills but also contribute to a growing community of makers and innovators who share a passion for technology and creativity.
If you’re looking to expand your creative potential beyond just Raspberry Pi projects, you may want to check out the article “Unlock Your Creative Potential with the Samsung Galaxy Book Flex2 Alpha”. This article discusses how this versatile laptop can help you unleash your creativity in various ways. Whether you’re into graphic design, video editing, or other creative pursuits, the Samsung Galaxy Book Flex2 Alpha could be a great tool to add to your arsenal.
FAQs
What is a Raspberry Pi?
A Raspberry Pi is a small, affordable computer that can be used for a wide range of projects, from simple DIY electronics to complex programming and robotics.
What do I need to set up my first Raspberry Pi project?
To set up your first Raspberry Pi project, you will need a Raspberry Pi board, a microSD card, a power supply, a keyboard, a mouse, a monitor, and an HDMI cable. You may also need additional components depending on the specific project you want to work on.
How do I set up my Raspberry Pi board?
To set up your Raspberry Pi board, you will need to download the operating system (OS) onto the microSD card, insert the microSD card into the Raspberry Pi, connect the power supply, keyboard, mouse, and monitor, and then power on the Raspberry Pi.
What are some beginner-friendly projects I can do with a Raspberry Pi?
Some beginner-friendly projects you can do with a Raspberry Pi include setting up a media center, creating a retro gaming console, building a weather station, and programming simple LED light displays.
Where can I find resources and tutorials for Raspberry Pi projects?
You can find resources and tutorials for Raspberry Pi projects on the official Raspberry Pi website, as well as on various online forums, blogs, and YouTube channels dedicated to Raspberry Pi enthusiasts.